


Counter using 7-Segments Display
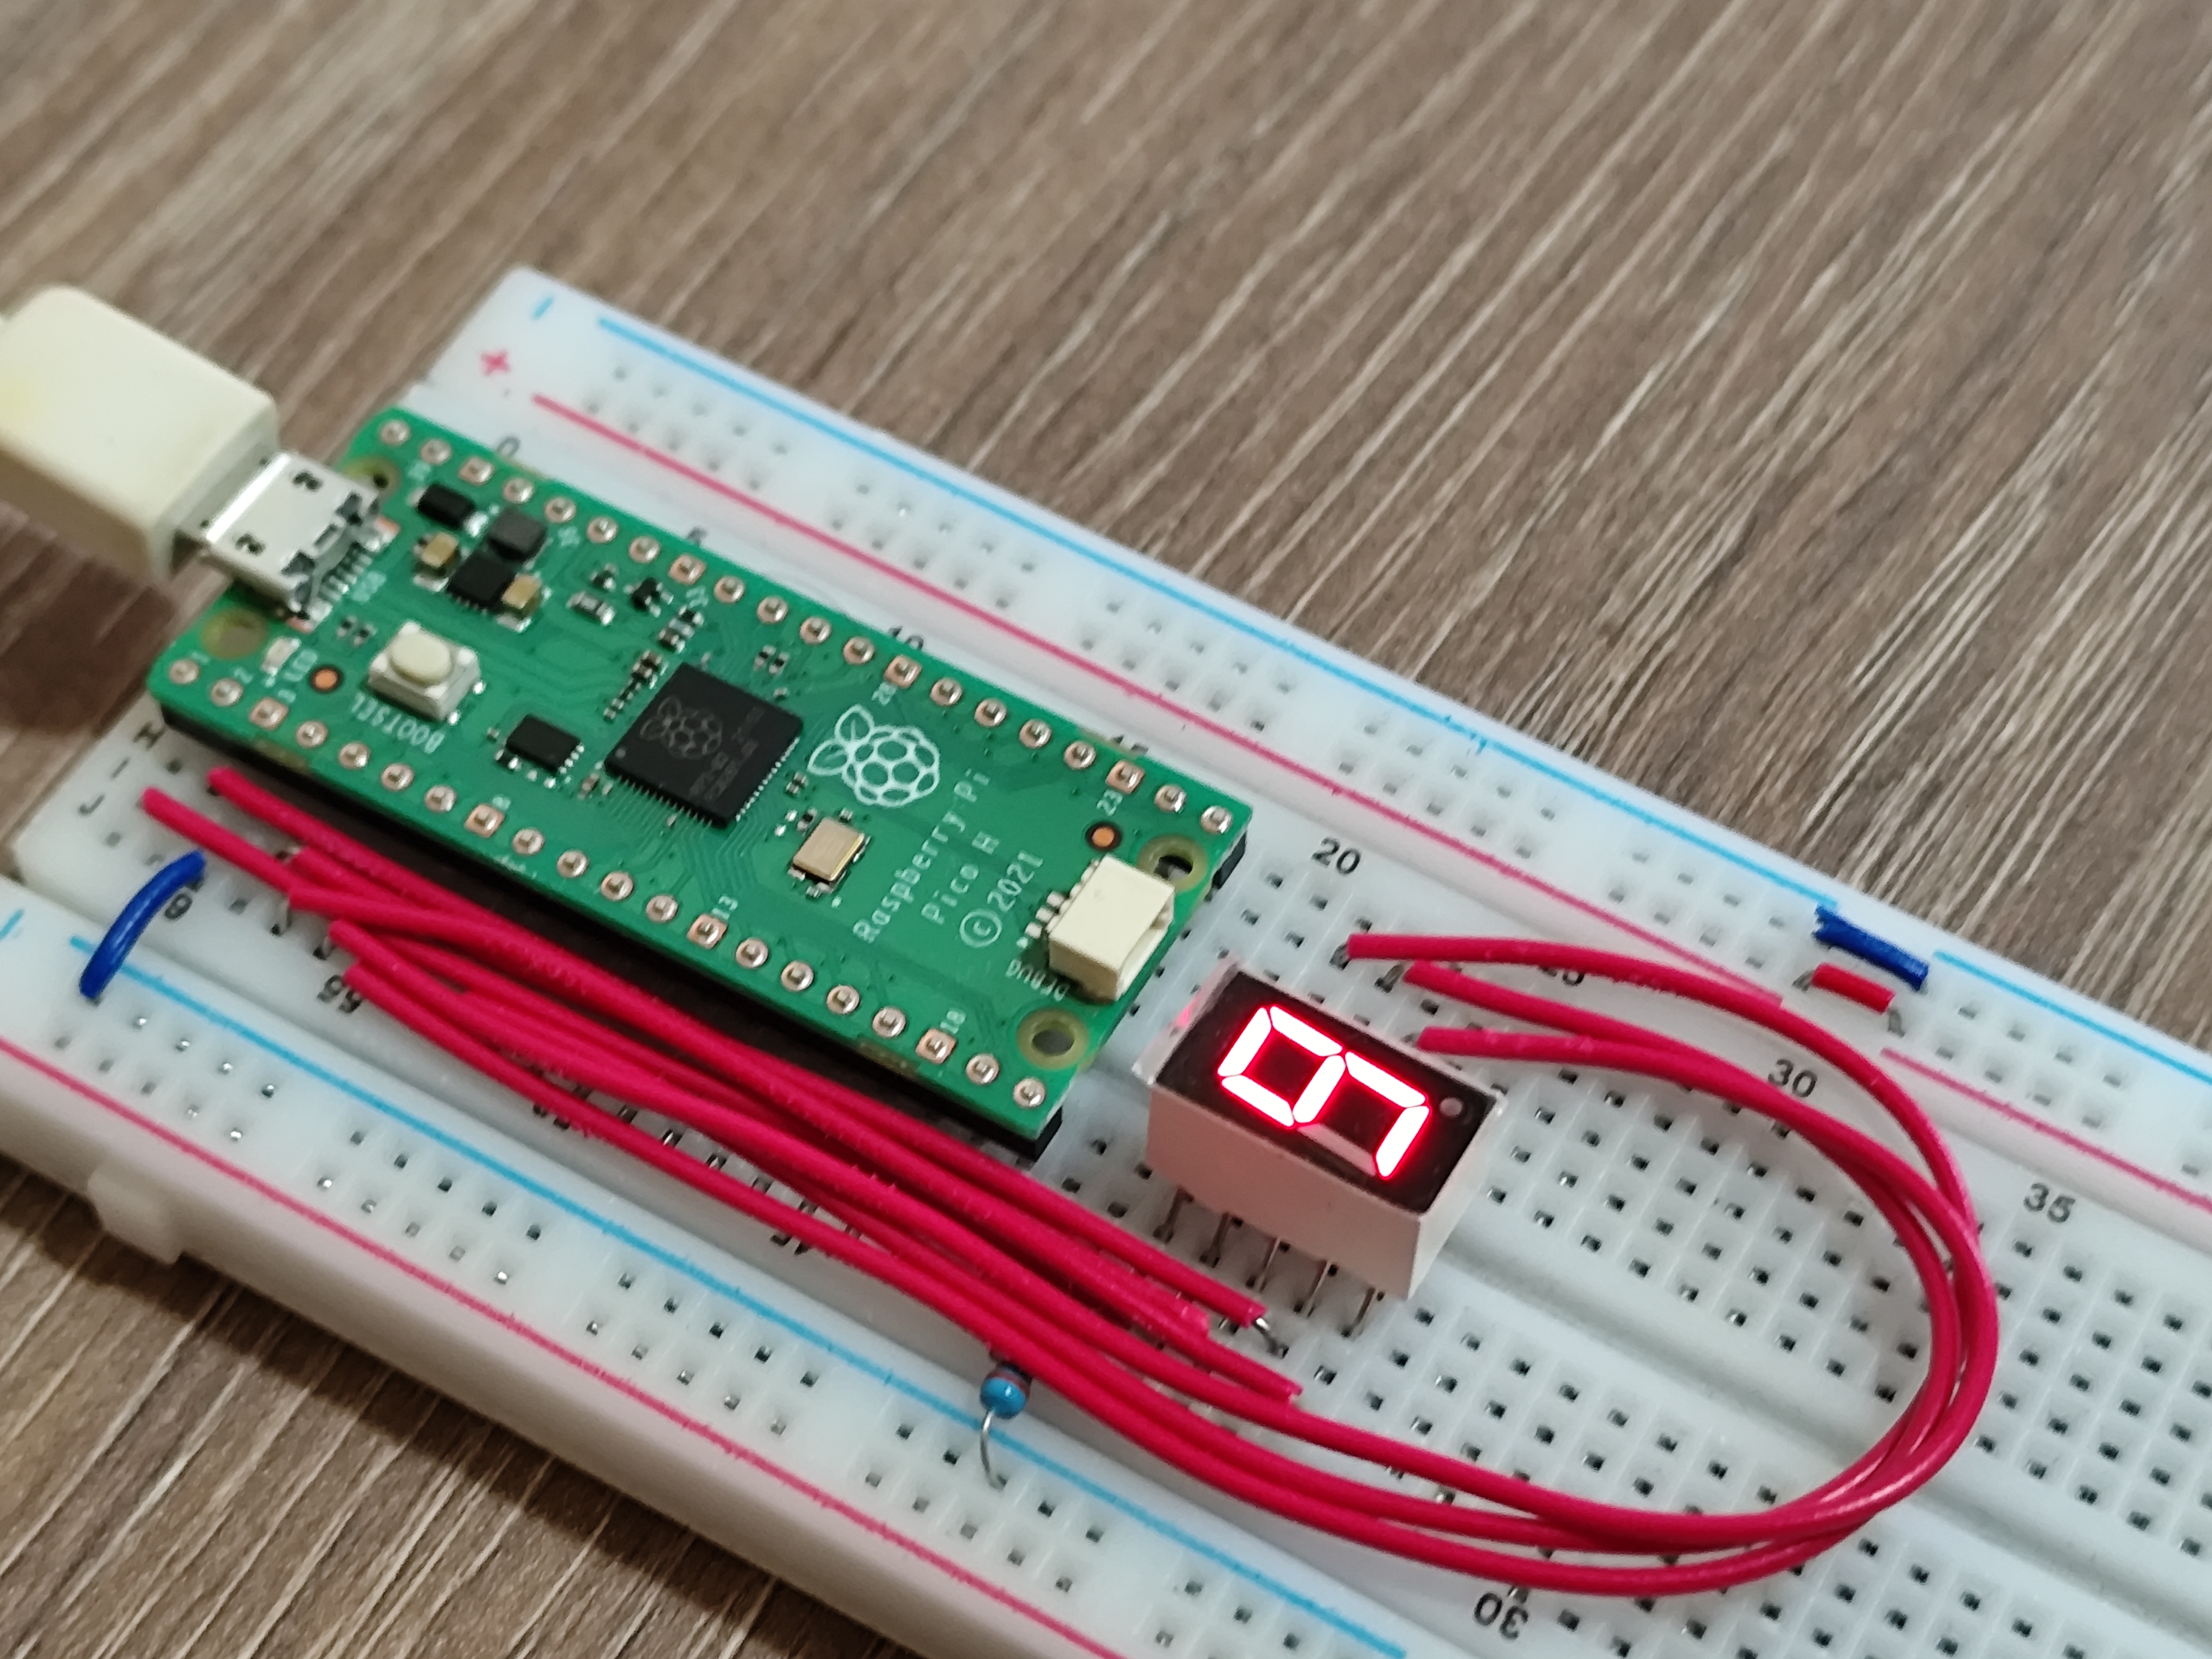
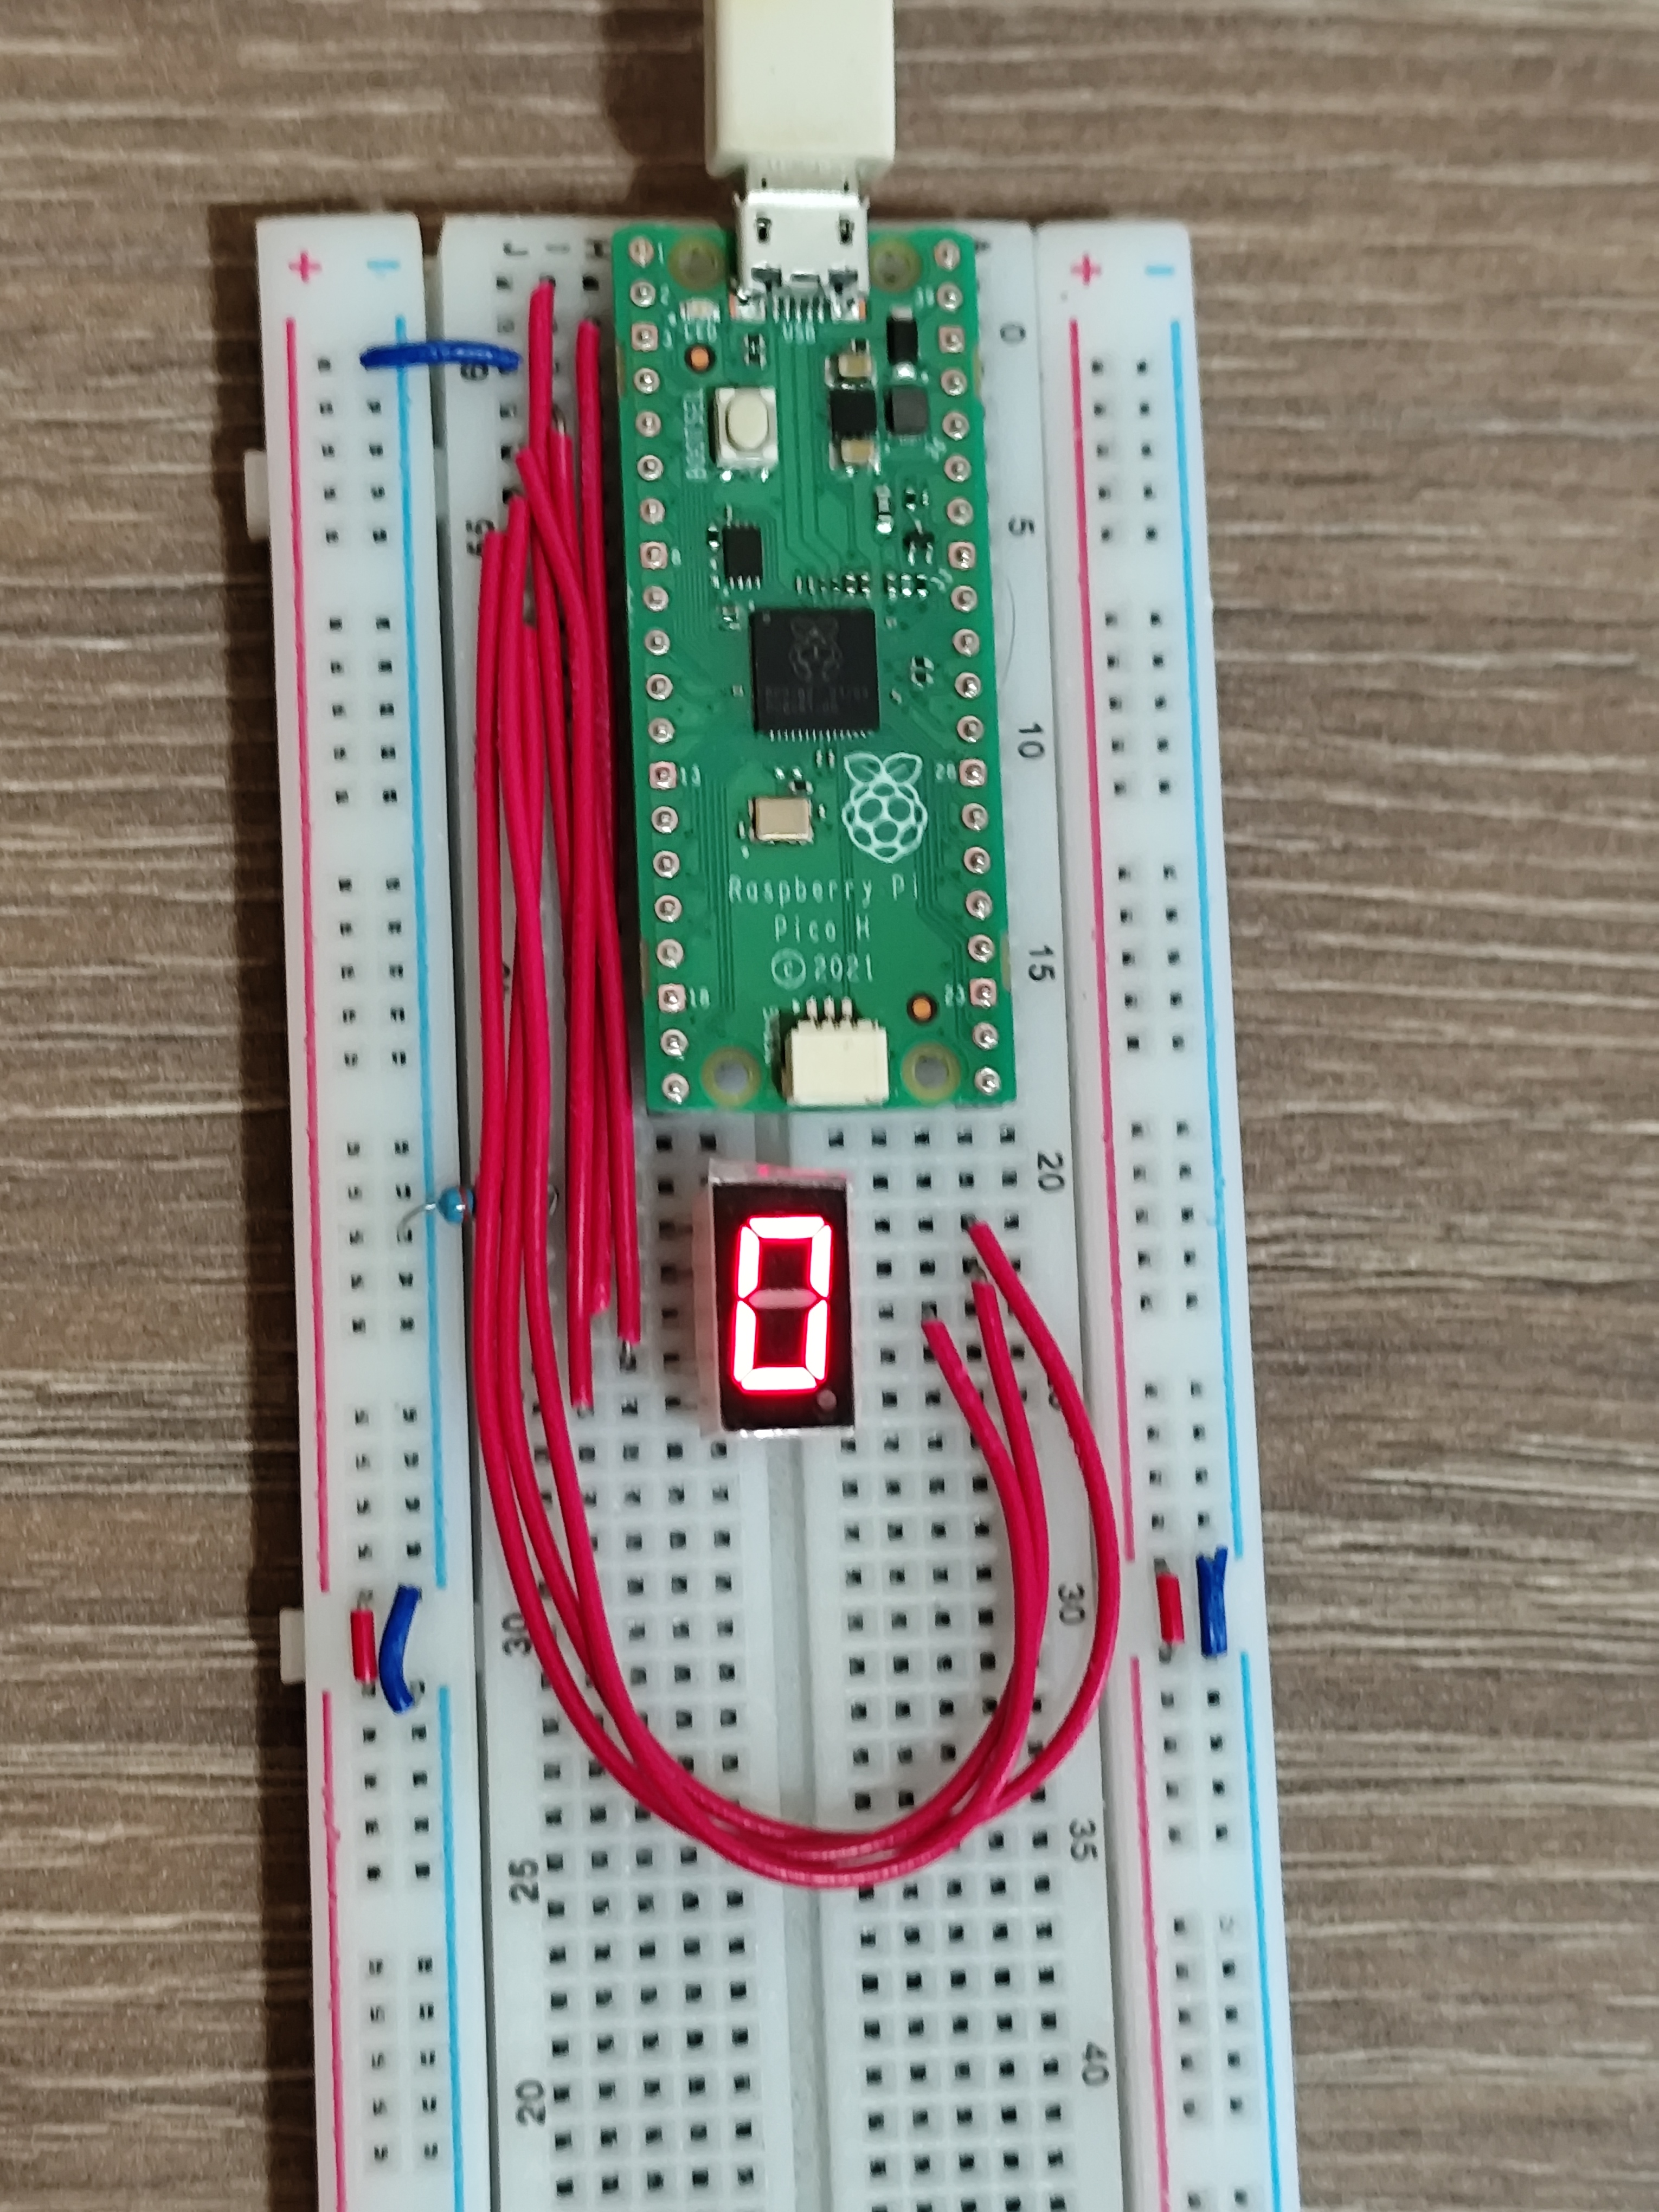
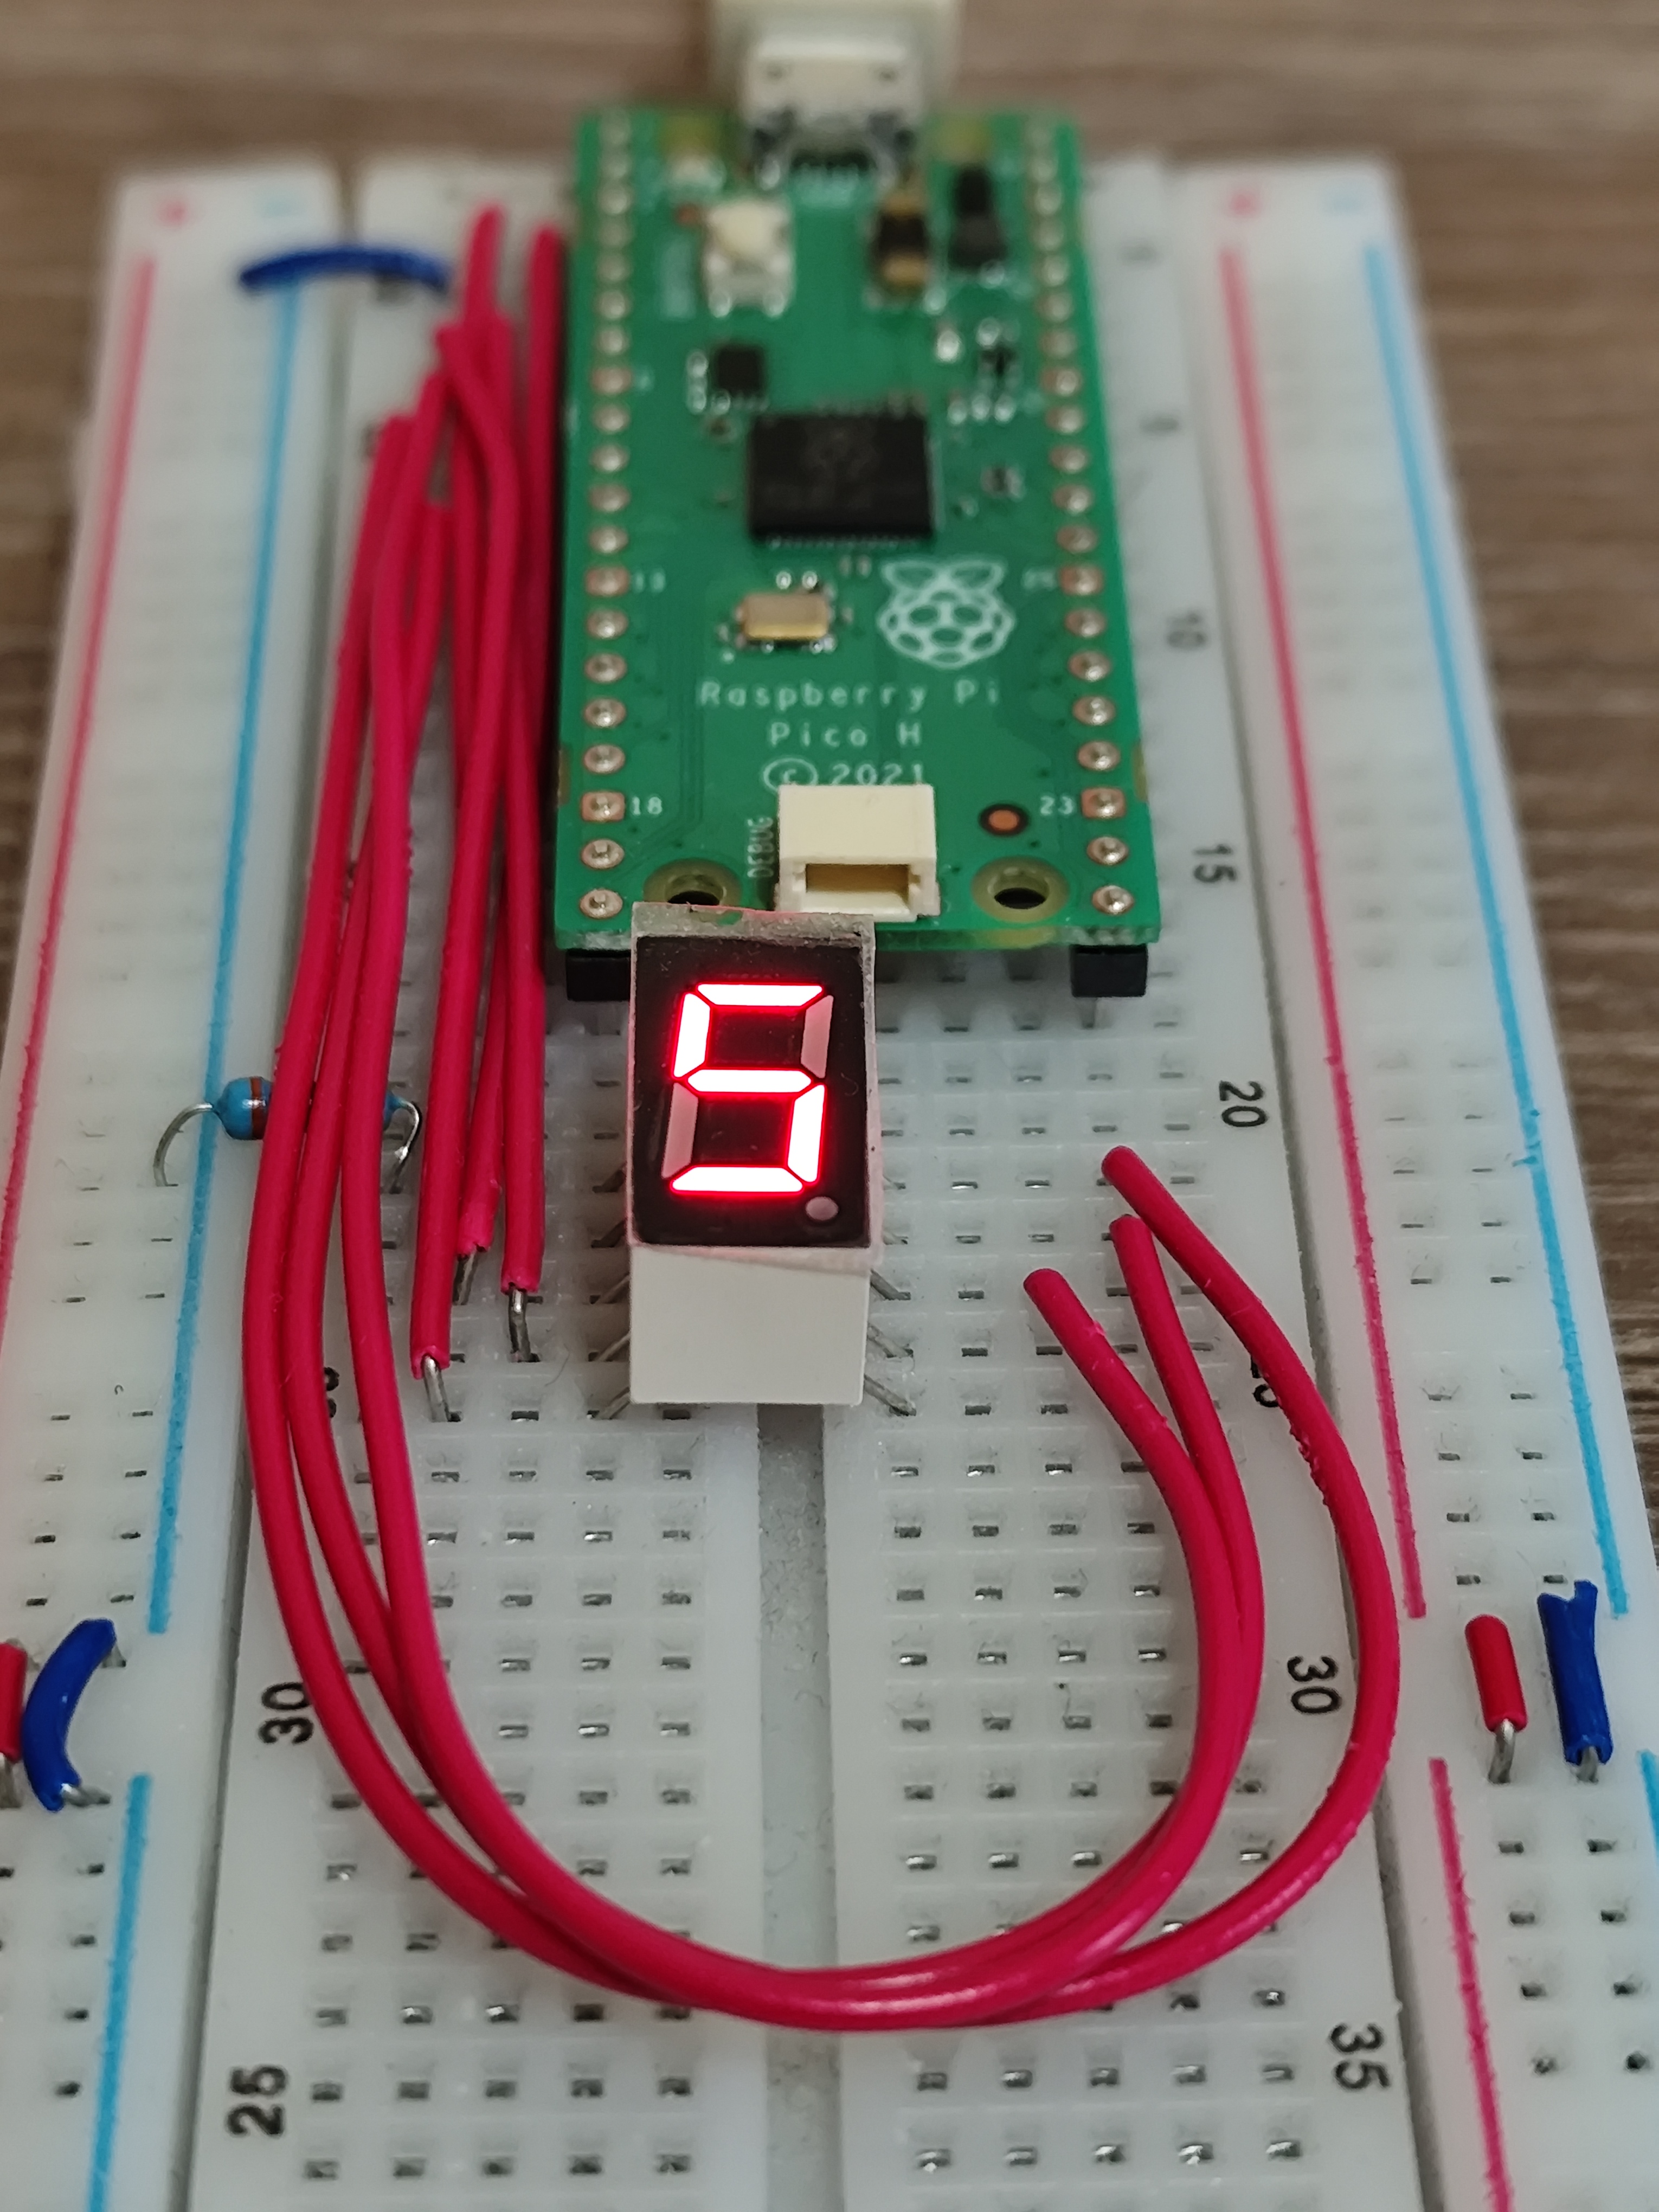
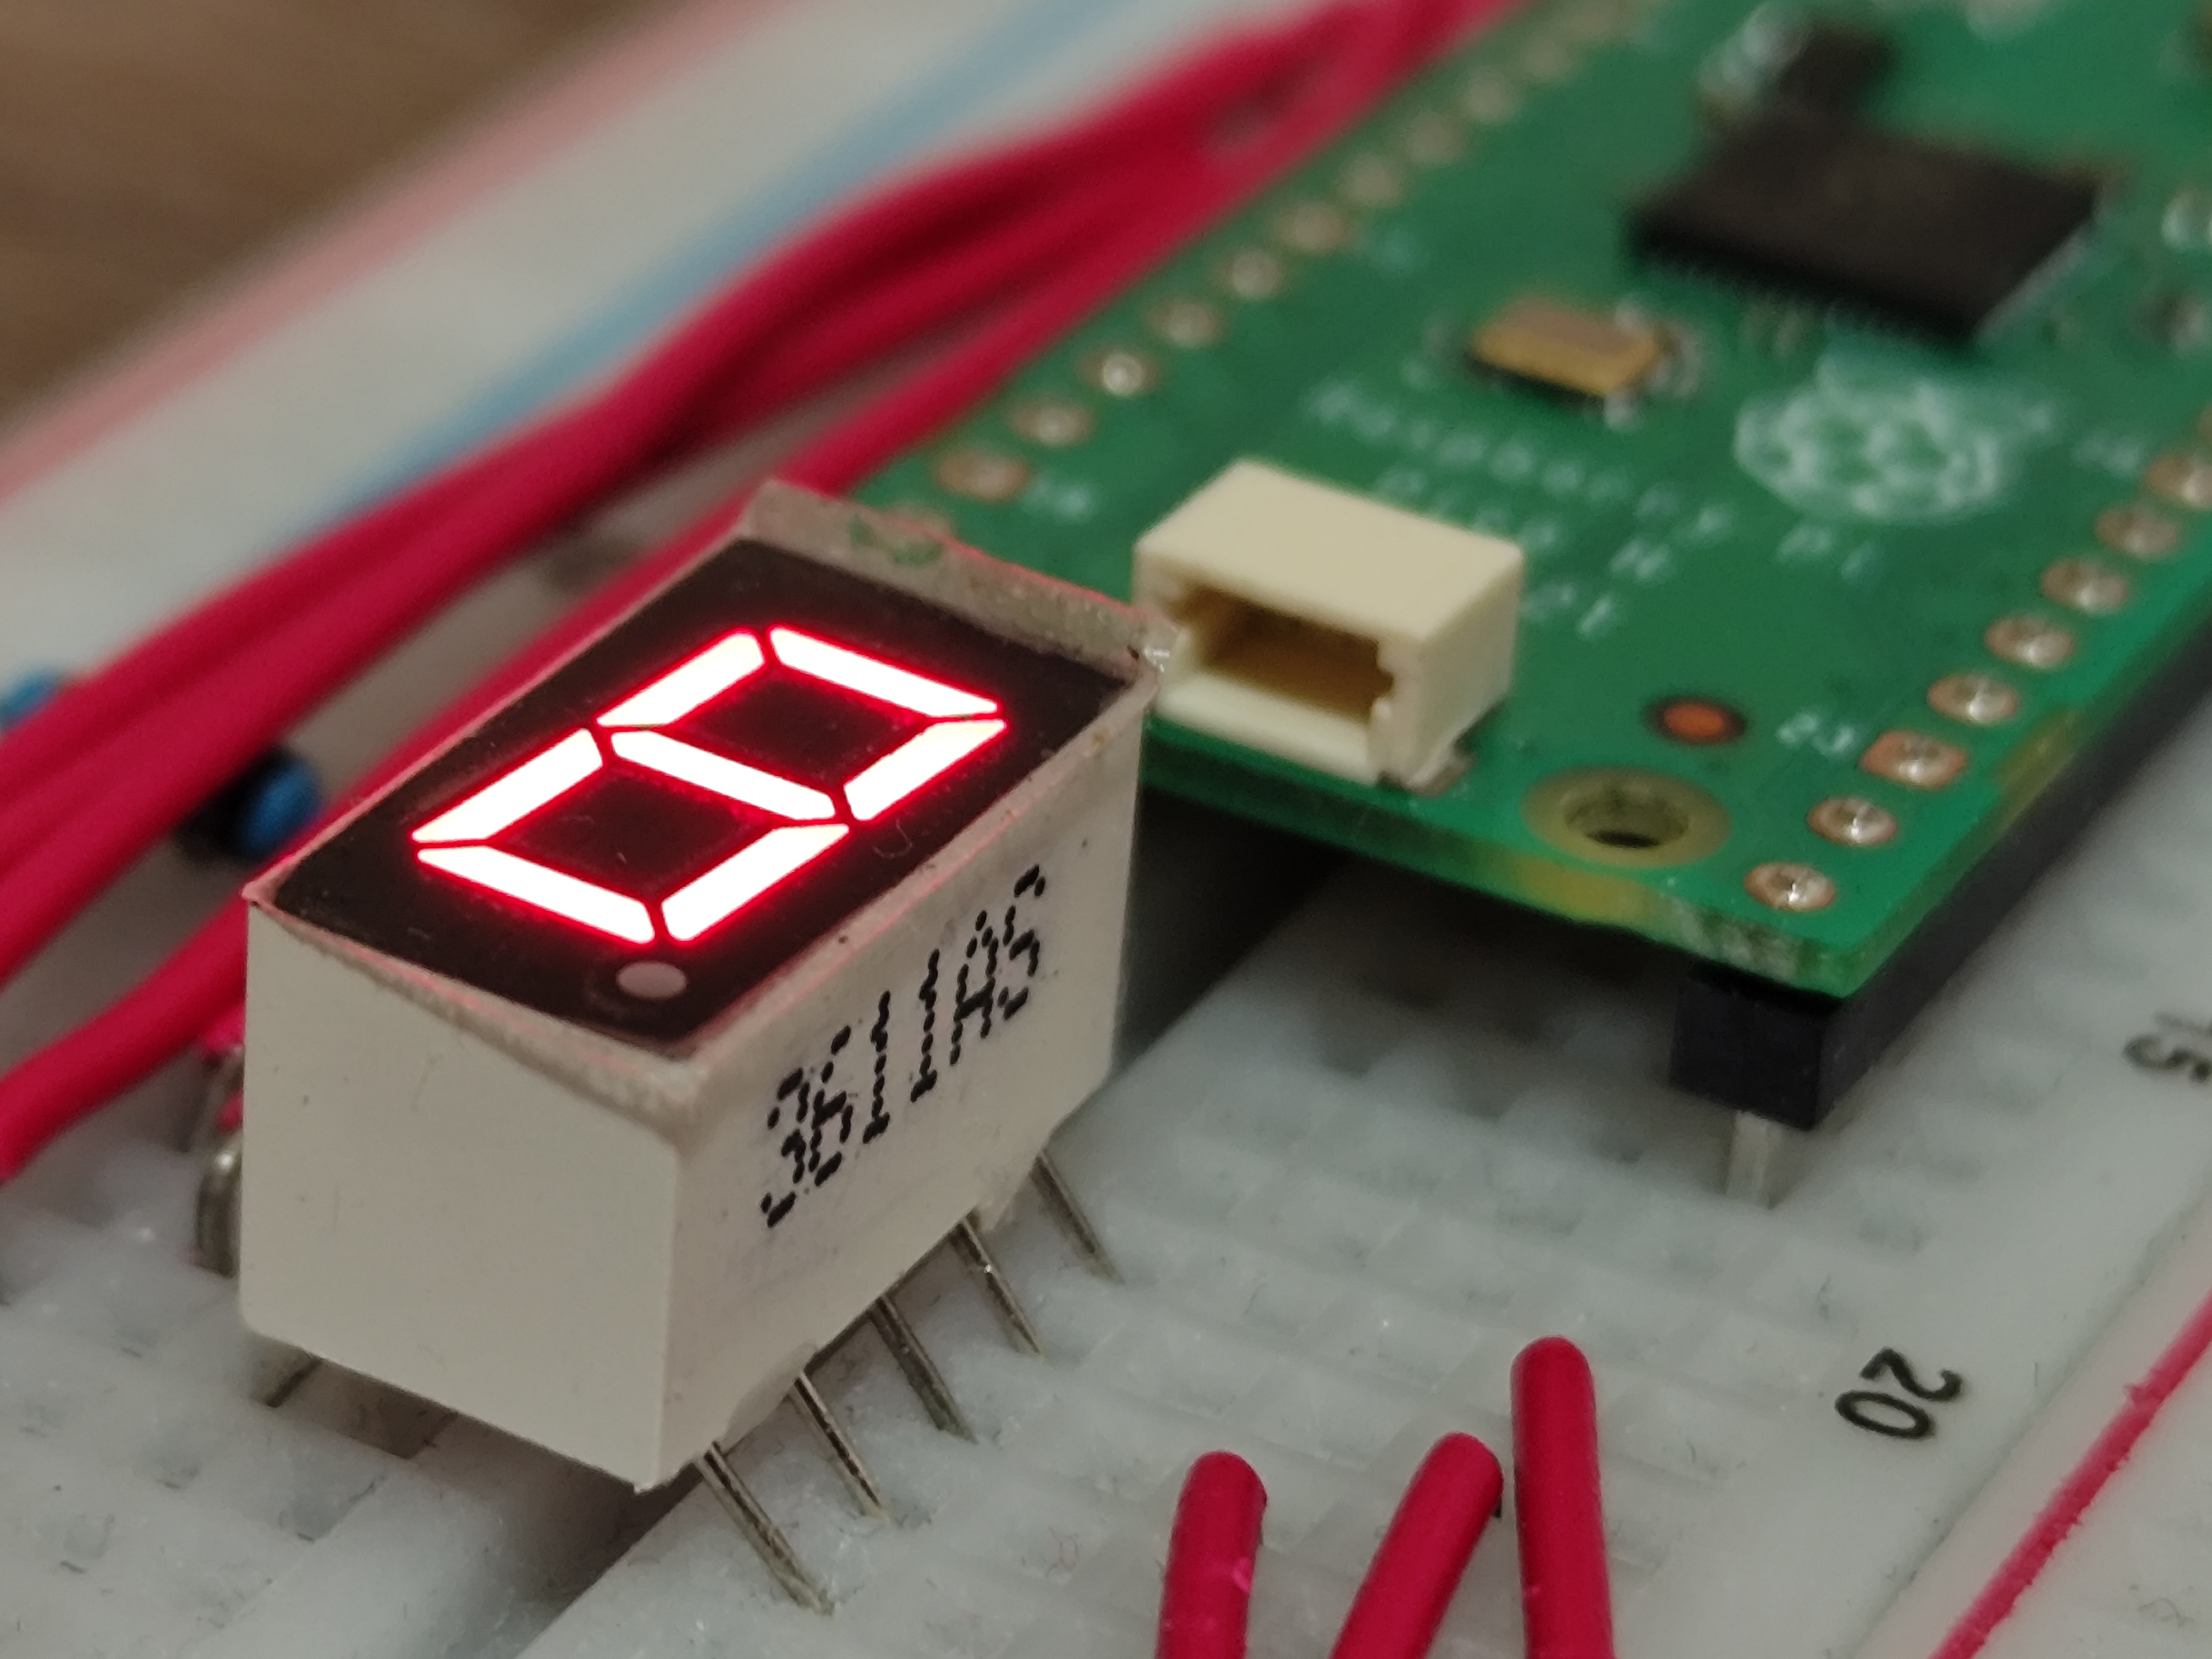
This is a very simple project created using a Raspberry Pi Pico board and a 3611AS LED 7-Segments Display.
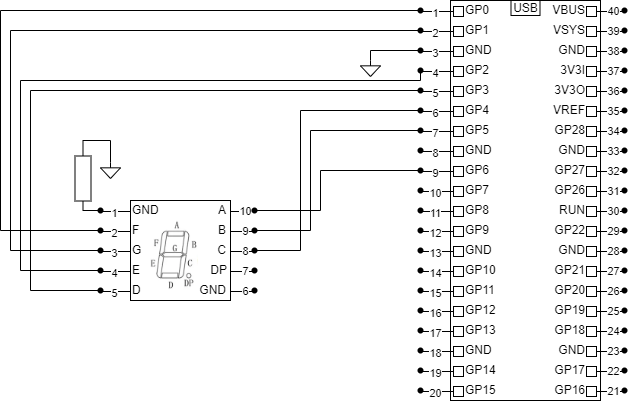
The display is connected to ground via a 330 ohms resistor. The pins are connected in order to the Pico's GPIO pins, as indicated in the diagram.
The 3611AS has a somewhat weird pin numbering, where pin 1 is ground, pin 2 corresponds to segment F, pin 3 corresponds to segment G, pin 4 corresponds to segment E, etc. (see the schematic for all the mappings).
The Pico's pins are connected in order, thus GPIO 0 is connected to pin 2 of the 3611AS, GPIO 1 is connected to pin 3, etc.
The mapping between the GPIO pins and the corresponding segments is done in software.
Power is provided through the USB cable connected to the Pico board (the other end of the USB cable can be connected either to a laptop or to a power adapter).
IMPORTANT:When building this circuit, don't forget to place the current limiting resistor, or your 3611AS will likely be damaged.
Resources
- My GitHub repository with the project: https://github.com/ComputingMongoose/PicoProjects
- 3611AS datasheet: http://www.xlitx.com/datasheet/3611AS.pdf